DIY concrete guide: Make your own box planters

by Juan Romano 09/17/2023

DIY concrete projects are a great way to increase your home improvement skills, while providing meaningful concrete crafts that could help you stay organized for years to come. However, concrete DIY projects can often seem daunting, but they can be as easy as any other DIY project.

For example, try turning an old cardboard box into a custom DIY concrete planter for your garden. Using just a few basic materials, you can create a durable planter box while getting second use out of an otherwise recycled item. Here is a guide to making your own DIY concrete planter box:

DIY concrete planter tools and supplies

  • 2 Cardboard boxes (one large for the outside of the planter, one smaller box for the inside)
  • Duct tape
  • Cardboard corner protector inserts
  • Concrete mix
  • Mixing bucket
  • Plastic wrap or sheet
  • Safety mask & gloves

How to make your planter

  1. Since cardboard isn’t watertight, you’ll need to reinforce it with duct tape to create a solid concrete mold. Cover the inside of the large box with duct tape and use the protector inserts in the corners. This will help the box keep its shape under pressure.
  2. Cover the outside of the smaller box with duct tape, taking care to completely cover the corners and edges.
  3. Mix the concrete in your bucket by adding the dry material and water. For the correct amount of water, follow the specific instructions included with the concrete. Stir the mixture until it’s smooth, adding more water as necessary.
  4. Fill the larger box about halfway with the concrete mixture.
  5. Press the smaller box into the concrete mixture. Add something heavy to the box, like rocks or sand, to help maintain pressure.
  6. Carefully add more concrete to the sides around the small box until it reaches the top edge of the large box.
  7. Cover the entire box with plastic and allow it to cure for several days in a temperate environment. The curing time for your specific mixture may vary, so consult the instructions for details.
  8. Once the concrete has fully cured, it’s time to remove the boxes. Tear or cut the cardboard down each corner to pull away the sides. It’s optional to remove the inner box, but recommended to help avoid mildew from outdoor use.
  9. With the outer box removed, you’re free to sand away sharp edges if you wish. You might also consider using a concrete sealer.

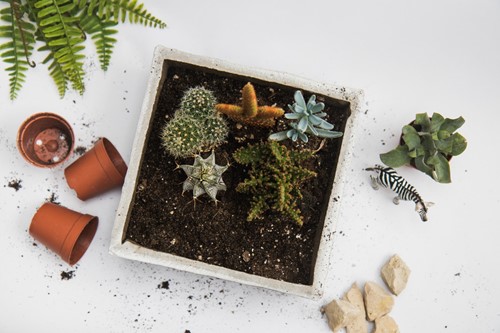
Now you have your own custom-made DIY concrete planter for your porch or garden. You can repeat this same process with any size or shape of cardboard box. Try adding concrete stain or paint for extra customization to match your personal garden decor.

About the Author
Author

Juan Romano

I'm Juan Romano, a Realtor with Premiere Plus Realty.  I graduated from Florida International University with a degree of Bachelor of Accounting and a Masters in Taxation. Prior to joining the Real Estate industry I worked as an accountant (CPA) for 5 years. My 20+ years of experience in the Real Estate industry allows me to serve my clients with the best decisions in their unique situations.

So, what do I do for all my clients? I take the stress away from selling or buying a home. I take care of all the details and paperwork, guide them through the process making the entire experience an enjoyable and relaxing one.